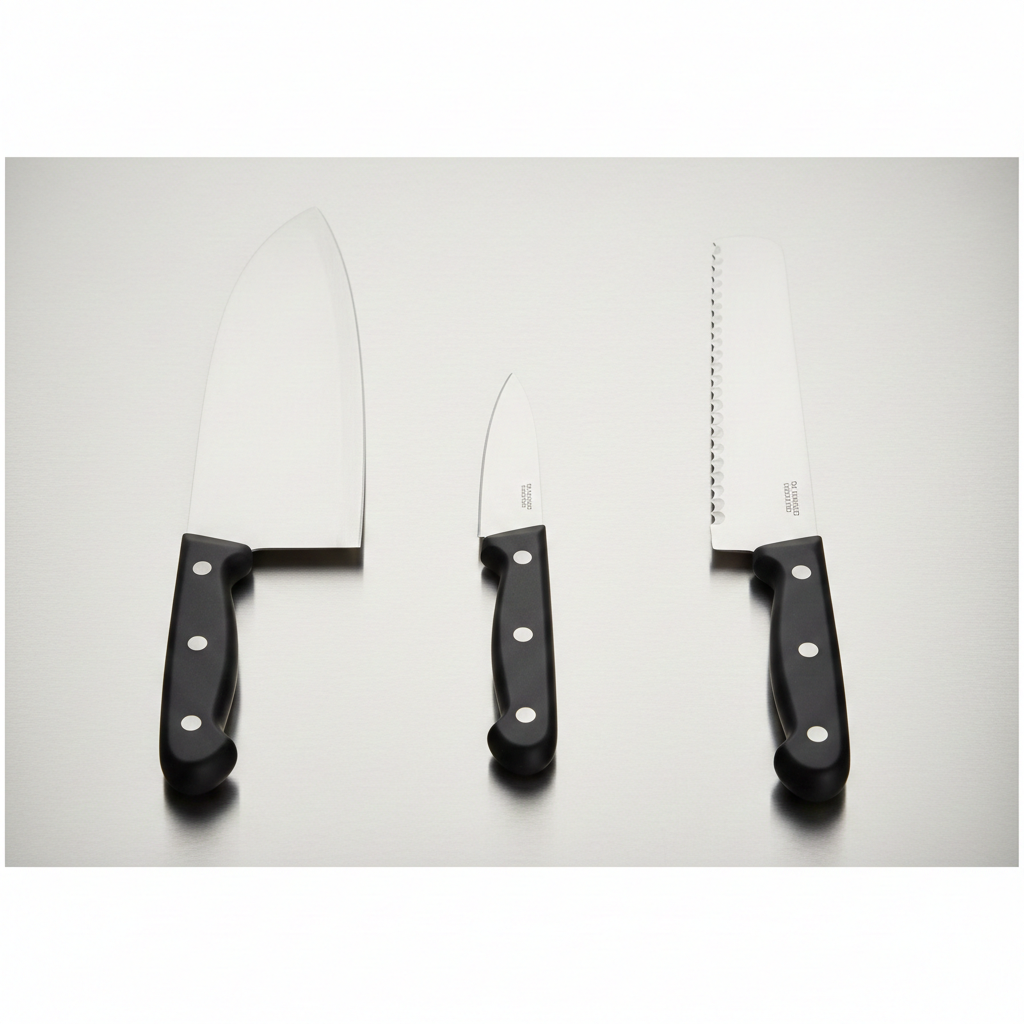
The "Big Three": The Essentials
If you were stranded on a culinary island, these are the three you’d want in your kit.
-
The Chef’s Knife (8-inch): This is your workhorse. From dicing onions to carving a roast, 90% of your work happens here.
-
The Paring Knife (3-4 inch): Think of this as the "detail" tool. It’s for peeling an apple, deveining shrimp, or removing the "eyes" from a potato.
-
The Serrated (Bread) Knife: Don't let the name fool you. Besides crusty sourdough, this is the best tool for slicing soft-skinned produce like tomatoes or peaches without crushing them.
Expanding to the "Top 5"
If you want a truly complete kitchen, add these two:
-
The Utility/Petty Knife (5-6 inch): It’s the "in-between" knife. Perfect for slicing a block of cheese or a single sandwich when the Chef’s knife feels like overkill.
-
The Boning Knife: If you ever prep your own chicken or trim a silver skin off a tenderloin, a flexible boning knife is a game-changer for safety and precision.
Which Knife for Which Job? (Practical Examples)
-
Dicing a Bag of Onions: Reach for the Chef's Knife. The weight and "rocking" motion make this fast and safe.
-
Slicing a Ripe Tomato: Use the Serrated Knife. The teeth "saw" through the skin without needing downward pressure that squishes the juice out.
-
Hulling Strawberries: This is Paring Knife territory. It's small enough to manipulate with your fingers for delicate tasks.
-
Carving a Thanksgiving Turkey: Use the Chef's Knife (if it's sharp!) or a Slicing Knife.
-
Breaking Down a Whole Chicken: The Boning Knife allows you to feel the joints and navigate around bones without dulling your main Chef's knife.
Features of a Truly Great Knife
When you're shopping, ignore the "As Seen on TV" logos. Look for these four things:
-
Full Tang: The metal of the blade should run all the way through the handle to the very end. This provides balance and prevents the handle from snapping off.
-
The "Bolster": This is the thick transition point between the blade and the handle. It protects your fingers and adds "heft."
-
Forged vs. Stamped: Forged knives are made from a single piece of heated metal; they stay sharp longer and feel more substantial. Stamped knives are cut out of a sheet of metal; they are lighter and cheaper, but often less durable.
-
Comfort: A knife is like a shoe. It doesn't matter how expensive it is if it doesn't feel good in your hand. Hold it before you buy it.
The Million Dollar Question: Expensive vs. Cheap?
I’ll let you in on a kitchen secret: A $20 sharp knife is better than a $300 dull knife.
-
Expensive Knives ($150+): You are paying for high-carbon steel that holds an edge for a very long time, better balance, and beautiful craftsmanship. They are an investment for life.
-
Budget Knives ($20–$50): Brands like Victorinox (the ones with the fibrous plastic handles) are the industry standard in many professional kitchens. They are "stamped," but they are durable, easy to sharpen, and you won't cry if you drop one.
My Advice: Spend the "big money" on your Chef's knife. Buy a mid-range Serrated knife, and go cheap on the Paring knife—they tend to get lost or thrown away with the vegetable peels more often than you'd think!
How to Keep Your Edge
A dull knife is a dangerous knife because it requires more force, which leads to slips.
-
The Honing Rod is NOT a Sharpener: That long metal rod in your knife block doesn't remove metal to sharpen it; it just "re-aligns" the microscopic teeth of the blade. Use it every time you cook.
-
Hand Wash ONLY: Never, ever put a good knife in the dishwasher. The heat, harsh detergent, and clanking against other dishes will ruin the edge and the handle.
-
Use the Right Surface: Only cut on wood or plastic boards. Glass, marble, or ceramic boards are "knife killers"—they are harder than the steel and will dull your blade instantly.
-
Professional Sharpening: Once or twice a year, take your knives to a pro or use a whetstone. If you can't slice through a piece of paper cleanly, it's time.